Thursday, 6 October 2011

Lost & found; right &wrong

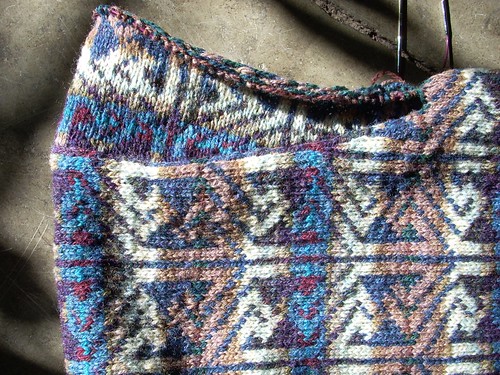
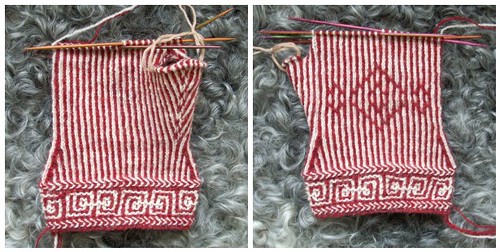
Twined mitten in progress by Asplund
Twined mitten in progress, a photo by Asplund on Flickr.
Shortcuts are great in many ways, but it is a major disadvantage that your knitting might get caught by twigs without your noticing it. Fortunately, a neighbour found my twined mitten among the lilac shrubs after it had been missing for days and I had almost given up hope. 

I started it for my twined knitting workshop to show some patterns you can make with two colours. This project also shows the pattern effect you achieve when you place the increases for the thumb gusset in the middle of it: the two colours almost look braided.

Speaking of braids, one of the participants asked me about knitting a braid in a contrast colour, when to join it in and for how many rows to keep it.

Twined braids
I said you have to prepare for the braid by joining in the new colour the row before the braid - and was later ashamed to realize I had done exactly the opposite of what I had been preaching. More than once I told the group I didn't like right and wrong, the idea that you have to do things in a certain way because that's how they are done.

I also quoted Dödergök: "Traditions are there to enrich my knitting, not to restrict it." I love traditional knitting and have learnt a lot from knitting old patterns and trying to master different techniques, but after all, what is regarded as traditional now was once new. And quite possibly, perhaps certainly, regarded as wrong by some.


Of course you don't have to join in the new colour the row before you make the braid; it will just look different. I'm working on a swatch testing various combinations.

All the braids have exactly the same structure (if they were all white they would be identical) but turn out completly different depending on when I add a colour, for how many rows I keep it and which row(s). These are about half of the combinations I can think of, and it's quite exciting seeing them take shape! And I haven't even added a third colour...

Which one is right then? Well, I'd say the one you want to make is the right one.

Last but not least, Åsa likes her "Viften" cardigan. I think it's a great colour for her!

Thursday, 22 September 2011

Twined knitting with two colours

Twined knitting by Asplund
Twined knitting, a photo by Asplund on Flickr.
I do like swatches, but it's also nice to combine swatching with making something you can use.

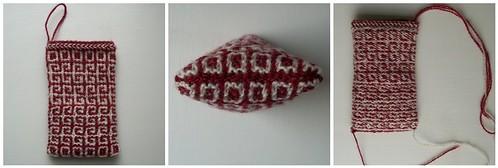
The other day I saw super knitter Tålamodspåsen's phone case and thought I'd make one for myself to test a couple of pattern ideas for twined knitting.

For easy comparison I like having different versions of the same idea in a swatch, in this case a pattern with knit stitches and then with both knit and purl stitches. Not only do they look and feel slightly different, the one with purls is thicker too.

Twined knitting with two colours looks a bit like mosaic knitting, but there are major differences. In mosaic knitting you knit with one colour at a time and slip stitches to make a pattern; in twined knitting you knit with both colours and cover stitches with the strand you don't knit with to make a pattern. I haven't knitted much mosaic knitting, but it seems to me it tends to curve (depending on the pattern) in a way twined knitting doesn't. Not that it's a bad thing necessarily - I can see how it could be an effect you'd want to achieve.

All the twisting makes it necessary to unwind the two strands every now and then.
Having just one ball of yarn makes it easier: you just let it hang in the air.


Edited to add: how I wish I could draw like Mattias!

Tuesday, 13 September 2011

Lace knitting

"Bressay Hap Wrap" in progress by Asplund
"Bressay Hap Wrap" in progress, a photo by Asplund on Flickr.
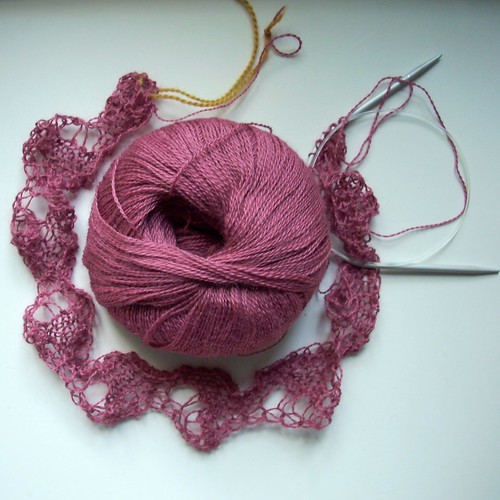
Here's my new lace project, "Bressay Hap Wrap" by Sharon Miller, a free pattern from Rowan. The yarn is also from Rowan, a blend of merino and alpaca called Fine Lace and I got it from Wincent in Stockholm. Thanks, Eva!

Speaking of lace knitting, as mentioned in a previous post I will be leading a couple of workshops with GarnGalleriet in Uppsala. The dates are settled, October 16 (all day) and 29 (afternoon). For more information, write to info@garngalleriet.se

(It feels rather silly writing this in English - as if anyone would even consider travelling from another country for a workshop - but changing languages in the middle of a blog post would also feel silly!)

But first a twined knitting workshop at Litet Nystan to warm up! I'm having fun preparing material and sort of relearning the techniques (studying what my fingers to more or less automatically by now) to be able to explain them well.

"Bressay Hap Wrap" by Sharon Miller

Tuesday, 6 September 2011

And they lived happily ever after

And they lived happily ever after by Asplund

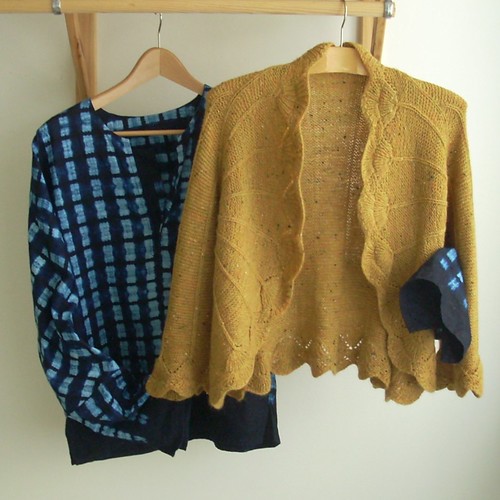
Here's the shirt my colleague made for me and the cardigan I made for her. We'd like to see this as proof we're so good at co-operation that our salaries should be raised dramatically!

Sunday, 4 September 2011

Grafting "Viften/The Fan"

Grafting "Viften/The Fan" by Asplund
Grafting "Viften/The Fan", a photo by Asplund on Flickr.
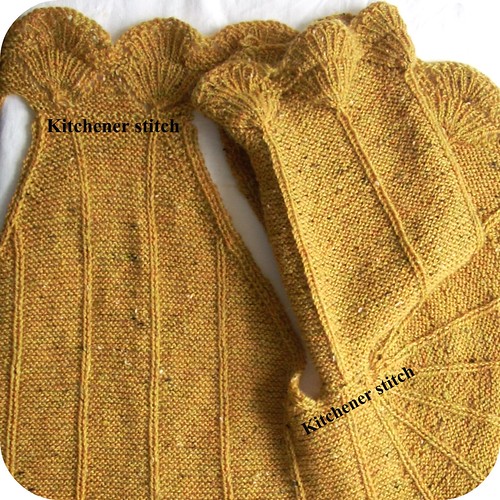
I like avoiding seams as far as possible, not only because I don't like sewing, but also for comfort: why have welts at the back of the neck and under the arms if you can avoid them?

For this project I have learnt how to graft garter stitch. I have grafted stocking stitch before ("Kitchener stitch") and was happily surprised garter stitch was easier. Excellent instructions here. (Of course, this is a form of sewing too, but I don't mind it that much when the resulting seam looks like knitting.)

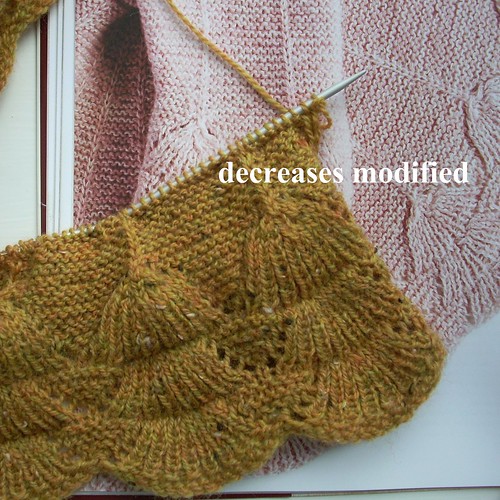
I have been asked how I modified the decreases knitting the border.

Here are the four kinds I've used:

1. "knit two together" for decrease to slant to the right.

2. "slip one as if to knit, slip one more as if to knit, put both back on left needle and knit them together through back loops" for decrease to slant to the left.

3. "slip one as if to knit, slip one more as if to knit,knit one, pass slipped stitches over the stitch just knitted" for a double decrease when the middle stitch is top of a purl ladder (to avoid a purl on top). You could simply knit three together (the knit stitch to the left would end up on top instead of the one to the right) but that decrease feels slightly more like a bump in my picky fingers' opinion.

4. "slip two together as if to knit, knit one, pass slipped stitches over the stitch just knitted" for a double decrease where the middle stitch end up on top of the other two.

Thursday, 1 September 2011

Same but different

Same but different by Asplund
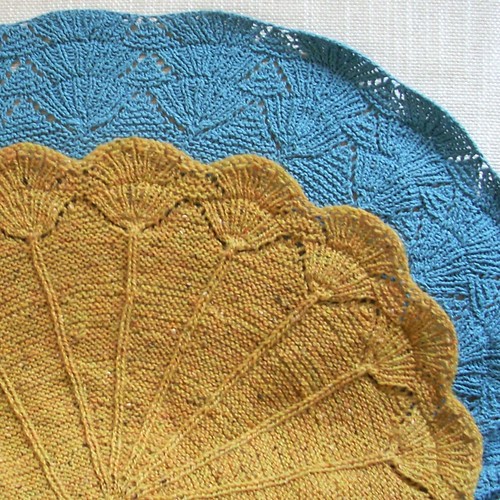
Here's the first "Viften/The Fan" I knitted a couple of years ago (blue bourette silk) and the third one I'm currently making (yellow merino wool) for comparison. There are a few differences apart from colour and fibre:

1. I decided to cast on a lot more loosely for a more pronounced scalloped edge.

2. There is an extra row (purls on the right side) to make the edge curl slightly.

3. Border pattern two repeats instead of three (to save yarn to be on the safe side).

There are sleeve modifications too:

1. Border five repeats wide instead of four to make the sleeves less narrow. This will make modified raglan shaping necessary, but I've decided to wait with calculations until I get there.

2. Sleeves knitted in the round to avoid a seam. When I get to the armholes I will start knitting back and forth for the raglan shape, though.

3. The instructions allow you to choose between short and long sleeves, but these will be medium length instead (like the previous one I made).


What else?
I'm quite excited about a twined knitting workshop I will be leading at Litet nystan in a few weeks! Equally exciting is planning a couple of lace knitting workshops with GarnGalleriet in Uppsala in October - will write more details about that when we've made more decisions.

Thursday, 25 August 2011

Viften/The Fan no 3

Viften/The Fan no 3 by Asplund
Viften/The Fan no 3, a photo by Asplund on Flickr.
I've surprised myself by casting on a project practically identical to one I just cast off. Fair trade: I'm making this one for a colleague who's sewing me a shirt.

Any new modifications?

Anticipation...

Yes!
1. Border knitted in the round to avoid a seam at the back of the neck.
2. Border two repeats (see photo above) instead of three (photo here), partly simply for the sake of variation but primarily to save yarn. Each of the 28 repeats grows from 16 to 24 stitches wide. I think it looks nice this way too, and there's no need to worry about running out of yarn - and a couple of centimetres shorter will hardly make a difference.

Now over to some questions and comments on my previous post.

Ron: I picked up stitches around the armohole with a dark strand and wrapped with dark strands to keep the wraps from showing too much. (After discovering light wraps stand out a lot more.) I believe Alba is a Gaelic word for Scotland. (Incidentally, it is also Latin for "white" which is hardly the first thing that comes to mind when you see Starmore's design!)

Ann: it's difficult to explain why I had to turn it upside down, but I'll give it a try! The pattern itself is symmetrical, in a way that if knitted in two colours only there wouldn't be a problem. The colour sequences are symmetrical in a different way, though: a particular colour would be at the beginning of a pattern shape instead of at the end, for example. (Perhaps it wouldn't show much, but I didn't want to risk it. And it was a challenge I liked.)

Knitgoddess: I ordered a kit from Virtual Yarns. The colours are not identical to the ones in the book (and I believe the yarn is slightly thicker too) but at least they're Alice Starmore's own choice. Where can I see your "Pacific" sweater? Ravelry?

Sunday, 14 August 2011

"Alba" progress

"Alba" sleeve cap by Asplund
"Alba" sleeve cap, a photo by Asplund on Flickr.
First of all, thanks for all your birthday wishes and lovely comments on my previous post!

Back to work after my summer vacation I've had far less time to knit the past week, but have made progress with "Alba" that I thought I'd share.

The sleeves are modified in three ways:

1. Backand front sections shaped instead of straight from armhole to shoulder to avoid excess fabric under the arm.

2. Sleeve caps made using short rows (see earlier post) also to avoid excess fabric.

3. Pattern turned upside down for shapes and colour sequences to blend better where sleeve meets shoulder.


"Alba" shoulder

Now off to finish the second sleeve cap while I remember how to make it identical!

Monday, 8 August 2011

Isager's Viften/The Fan finished

Seamed, blocked and handed over to Åsa. The size was right for her, and she was happy with the modified sleeve length! Turned inside out it looks like this.

I'm quite obsessed with Alice Starmore's "Alba", knitting like mad. (A phenomenon not particularly uncommon...) I've modified it by shaping the armholes to make it a little bit less too big (see earlier post) and will modifiy the neck too; I want it slightly deeper and narrower than the original design. How I wish the photo captured the colours! The gorgeous hints of different greens are lost, for example.

Alice Starmore's "Alba"
Today is the last day of my summer vacation, so I'd better make full knitting use of it. Actually, it's my birthday too: I'm going to treat myself to extra extra knitting time! How old? 38. Really good age - my best so far!

Wednesday, 3 August 2011

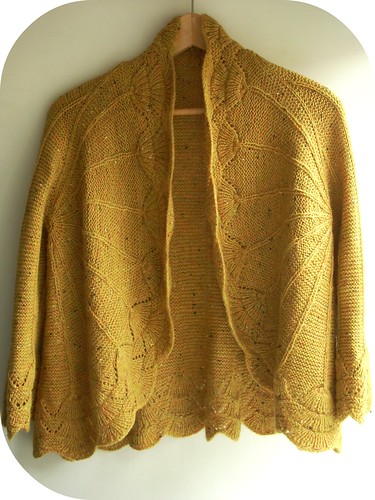
Isager's Viften/The Fan

Isager's Viften/The Fan by Asplund
Isager's Viften/The Fan, a photo by Asplund on Flickr.
Only seaming, darning and blocking left - and handing over to recipient, of course!

Yarn: BC Lucca Fino Tweed, 300 grams.
Needles: 3½ mm (US 4).


Modifications in short:
  • back and front sections knitted together instead of separately
  • slip stitches on right side (easier to see when to make them)
  • increases and decreases on wrong side (less visible)
  • type of border pattern decreases changed for a smoother look and feel
  • there is a choice between short and long sleeves, but Åsa wanted medium length; I’ve made them 90 rows long between border and armhole with increases 6 times every 6 rows and 5 times every 8 rows
  • border and back of neck grafted (Kitchener stitch) instead of three-needle bind-off to avoid a welt
  • an extra stitch added at each side for selvedge, and I’ve slipped the first stitch every row with yarn in front and knitted the second one
I also cast on a lot more loosely than in my first version of this design for the scalloped edge to be more pronounced, and I added a first row (purls on right side) for the edge to curl slightly.

If I make it a third time I will knit the border in the round to avoid a welt where the edges are seamed.

Monday, 1 August 2011

First sleeve done

There's a choice between short and long sleeves in the instructions; Åsa (who will get the cardigan) and I agree it would be nice with medium-length sleeves.

Here's my modified sleeve size if anyone's interested:

1. There are 90 rows from border to armholes.
2. Increases every 6 rows 6 times, then every 8 rows 5 times.

I've been adding to my collection of works in progress, starting Alice Starmore's "Alba" sweater. Stranded colourwork is really what I like best when it comes to techniques, especially knitting a pattern like this. You just can't beat her sense of colours - unfortunately, this photo does not do them justice.

I can't remember when I was this excited about a project last: it's a thrill seeing it take shape in my hands.

The only thing I can't understand is Alice Starmore's tension! I don't knit particularly loosely (don't think I've ever had to change needle sizes to get the gauge called for) but in this case I get 24 instead of 28 stitches per 10 cm (4 in) even though I use thinner needles, 3 mm instead of 3.25 (US 2½ instead of 3).

I could go down one more size but feel the sweater will be too stiff for my taste if I do. Instead, I'm following the directions for a size smaller than I want - and it will still be a bit too big!

Now, I love Alice Starmore's designs and would love to meet her and thank her in person for everything I've learnt and been inspired by - but judging from her tension I would hardly let her massage my shoulders ;-)

Tuesday, 26 July 2011

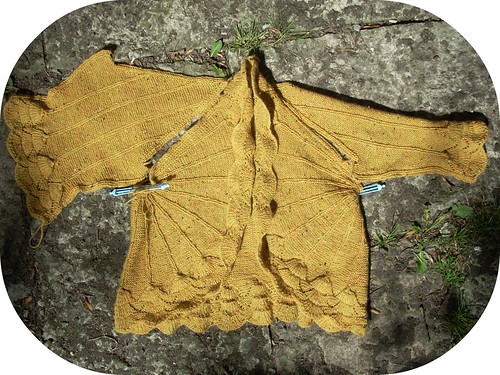
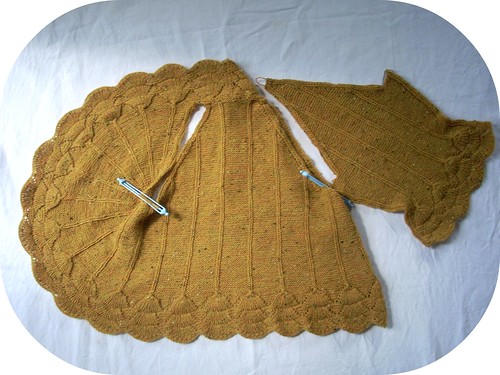
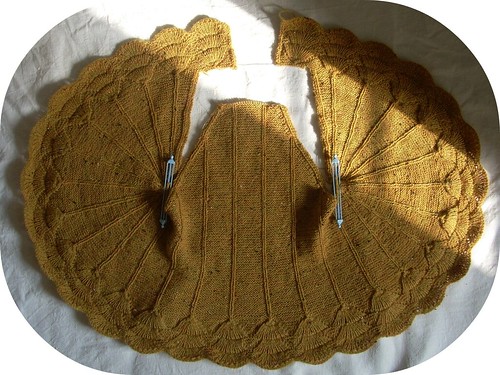
"The Fan" construction

This is what it looks like folded into proper shape;
makes me eager to start knitting the missing sleeves!
Late last night I finished the raglan-shaped back section from the armholes to the back of the neck. I think Marianne Isager's construction is ingenious!

The border is to be seamed and then attached to the back. I think I will graft the pieces (Kitchener stitch) instead of a three-needle bind-off to avoid a welt. For the same reason I will probably knit the border in the round if I make it again.

Monday, 25 July 2011

Frogging and knitting

My stitch itch returned last week and full force too! What better way to celebrate than to start yet another project?

There was a turning point when I decided to frog a project I felt I wouldn't be pleased with if I finished it and knitted a couple of swatches to check gauge for different kinds of patterns and needle sizes.

Suddenly I remembered I had ideas how to modify an intriguing cardigan design by Marianne Isager that I knitted two years ago, "The Fan" from Japanese-inspired Knits.

Modifications:
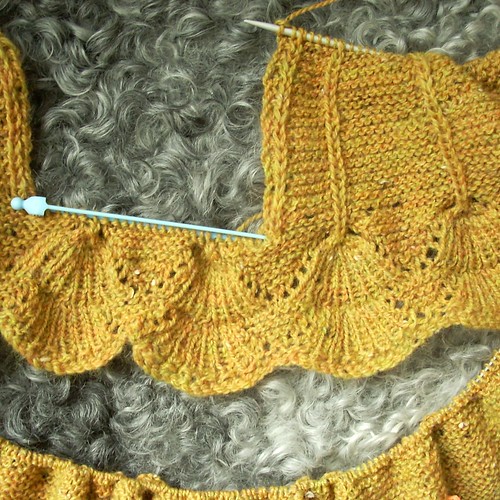
1. Different border pattern decreases for a smoother look and feel (attempt to illustrate in photo above).

2. Back and fronts knitted together instead of separately to avoid seaming. If I make it a third time I will knit the border in the round to avoid a seam at the back of the neck.


3. Casting on a lot more loosely for a more pronounced scalloped effect than in my first version. I also used the cable cast-on method instead of the long-tail method and added a row (knits knitted on the wrong side) for the edge to curl a bit more. This may also be seen in the photo above, at least if you know about it!

4. Adding a row between border and main sections. This entailed making slipped stitches on the right side (easier to see when to make them) and decreases on the wrong side (looks smoother from the right side) instead of vice versa.

5. Adding an extra stitch for a selvedge, starting each row by slipping the first stitch with the yarn in front.

What else to say about this project? The yarn is lovely Lucca Fino Tweed from BC, and I use 3½ mm needles (US 4). 

Monday, 18 July 2011

Not knitting but rowing

As I haven't been knitting much lately (sic! at one point a whole week passed without a single stitch) there isn't much to write about my projects.

Instead, I could write a post about something a couple of people have asked me: how I manage to knit as much as I normally do.


1. Speed. I've become faster over the years.
2. Taking opportunities. I usually have a project with me so I can knit a few stitches while waiting for the bus or whatever. Fortunately, I don't mind knitting in public anymore - but it took many years, and I still try to find a corner to knit in.
3. I don't work full time. (It just feels like it!)
4. Not owning a car. I commute to work, which gives me a lot of knitting time each week. Most of the Estonian shawl was actually made on trains!
5. Multitasking. I think well while knitting and I usually plan things, write texts (letters, blog posts etc) mentally while knitting. Typing texts doesn't take much time once they're "knitted" into shape.

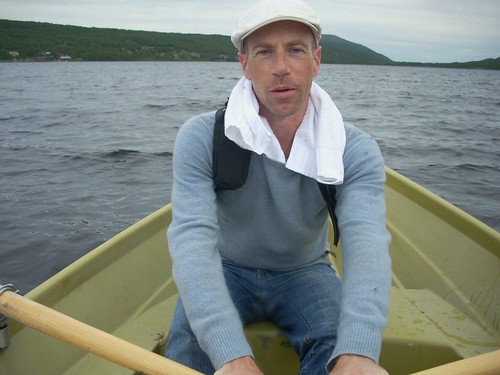
So, what have I been doing instead of knitting lately? Well, the most remarkable thing was finding some snow on 15 July during a trip to Härjedalen last week! This involved rowing across a lake, treading through mosquito-filled marshes and across barren hills before crossing the Norwegian border and walking some more. And then all the way back. Not much more than 12 kilometers (7½ miles) in all, but the hills were fairly steep and there wasn't much of a path.

Last, about the blog post title: here's a link to a poem I like, "Not waving but drowning" by Stevie Smith.

Lake Bolmagen

Saturday, 2 July 2011

Bits and pieces

Bits and pieces by Asplund
Bits and pieces, a photo by Asplund on Flickr.
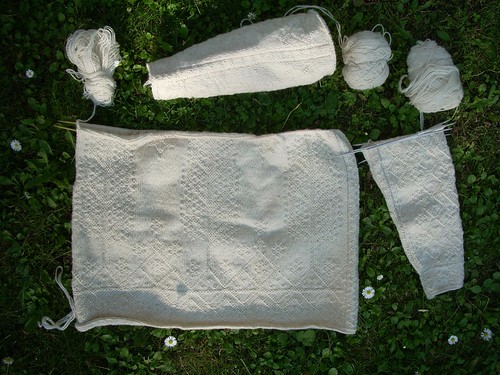
Back in Sweden dreaming of Italy... It's a good thing it's possible to combine daydreaming and knitting!
I'm working with the sleeves for my twined sweater. My plan is to join the different parts to make a raglan.

In a comment on my previous post Annegret asked why I don't like knitting socks.  Actually, I'm not quite sure, but probably it's because I like bigger projects with a lot more space for patterns.

Edited to add: after reading yarndude's comment (not to mention trying to explain in words) I searched for a video that shows how you hold the strands and found this video.